Pumpkin Challah
Forget going out to eat or ordering takeout every time you crave Jewish food. Try making Pumpkin Challah at home. This recipe makes 2 servings with 2256 calories, 60g of protein, and 46g of fat each. For $6.17 per serving, this recipe covers 44% of your daily requirements of vitamins and minerals. A mixture of nutmeg, cloves, brown sugar, and a handful of other ingredients are all it takes to make this recipe so tasty. This recipe is liked by 12 foodies and cooks. From preparation to the plate, this recipe takes approximately 3 hours and 30 minutes. It can be enjoyed any time, but it is especially good for Hanukkah. It is brought to you by Tori Avey. It is a good option if you're following a gluten free, dairy free, and lacto ovo vegetarian diet. Overall, this recipe earns a solid spoonacular score of 78%. If you like this recipe, take a look at these similar recipes: Pumpkin Challah, Healthy Pumpkin Challah, and Pumpkin Challah Bread Pudding for Two.
Servings: 2
Ingredients:
2 packages active dry yeast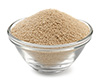
1/2 tsp allspice
1/2 cup brown sugar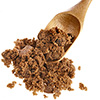
2 cups pumpkin puree (homemade or canned)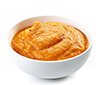
2 tbsp canola oil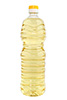
2 tsp cinnamon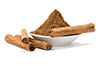
Pinch of cloves
1 egg (white and yolk)
6 egg yolks
1/4 tsp ginger
7-9 cups all-purpose baking flour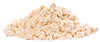
1/4 cup honey
3/4 tsp nutmeg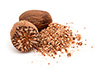
2 tsp salt
1 tbsp water
3 tbsp white sugar
Equipment:
mixing bowl
whisk
bowl
kitchen towels
sauce pan
stove
oven
frying pan
baking paper
baking sheet
cutting board
pastry brush
kitchen timer
aluminum foil
wire rack
Cooking instruction summary:
Pour ½ cup of the lukewarm water (about 110 degrees) into a large mixing bowl. Add 2 packets of Active Dry Yeast and 1 tbsp of sugar to the bowl, stir to dissolve. Wait 10 minutes. The yeast should have activated, meaning it will look expanded and foamy. If it doesn’t, your yeast may have expired, which means your bread won’t rise—go buy some fresh yeast!Once your yeast has activated, add remaining ½ cup lukewarm water to the bowl along with the rest of the sugar, egg, egg yolks, honey, canola oil, salt and spices. Use a whisk to thoroughly blend the ingredients together. Whisk in the brown sugar and pumpkin puree to form a thick liquid.Begin adding the flour to the bowl by half-cupfuls, stirring with a large spoon each time flour is added. When mixture becomes too thick to stir, use your hands to knead. Continue to add flour and knead the dough until it’s smooth, elastic, and not sticky. The amount of flour you will need to achieve this texture varies—only add flour until the dough feels pliable and “right.”Place a saucepan full of water on the stove to boil. Meanwhile, remove the dough from your mixing bowl and wash out the bowl. Grease the bowl with canola oil. Push the dough back into the bottom of the bowl, then flip it over so that both sides are slightly moistened by the oil.Cover the bowl with a clean, damp kitchen towel. Place the bowl of dough on the middle rack of your oven. Take the saucepan full of boiling water and place it below the rack where your dough sits. Close the oven, but do not turn it on. The pan of hot water will create a warm, moist environment for your dough to rise. Let the dough rise for 1 hour.Take the dough bowl out and punch it down several times to remove air pockets. Place it back inside the oven and let it rise for 1 hour longer.Take the dough out of the oven. Flour a smooth surface like a cutting board. Punch the dough down into the bowl a few times, then turn the dough out onto the floured surface. Knead for a few minutes, adding flour as needed to keep the dough from feeling sticky.Now your dough is ready to braid. If you plan to separate and bless the challah, do it prior to braiding. Separate the dough into two equal portions; each portion of dough will be enough for a large loaf of challah. Click here to learn How to Braid Challah.After you’ve braided your challah loaves, place them on two separate cookie sheets lined with parchment paper (this will catch any spills from your egg wash and keep your challah from sticking to the cookie sheet).Prepare your egg wash by beating the egg yolks and water till smooth. Use a pastry brush to brush a thin layer of the mixture onto the visible surface of your challah.Preheat the oven to 350 degrees F. Let the braids rise 30 to 45 minutes longer. You’ll know the dough is ready to bake when you press your finger into the dough and the indentation stays, rather than bouncing back.The challah will need to bake for about 40 minutes total, but to get the best result the baking should be done in stages. First, set your timer to 20 minutes and put your challah in the oven.After 20 minutes, take the challah out of the oven. Turn the tray around, so the opposite side is facing front, and put the tray back into the oven. Turning the tray helps your challah brown evenly—the back of the oven is usually hotter than the front.The challah will need to bake for about 20 minutes longer. For this last part of the baking process, keep an eye on your challah—it may be browning faster than it’s baking. Once the challah is browned to your liking, take the tray out and tent it with foil, then place it back in the oven. Remove the foil for the last 2 minutes of baking time.Take the challah out of the oven. You can test the bread for doneness by turning it over and tapping on the bottom of the loaf—if it makes a hollow sound, it’s done. Let challah cool on the baking sheet or a wire cooling rack before serving.
Step by step:
1. Pour ½ cup of the lukewarm water (about 110 degrees) into a large mixing bowl.
2. Add 2 packets of Active Dry Yeast and 1 tbsp of sugar to the bowl, stir to dissolve. Wait 10 minutes. The yeast should have activated, meaning it will look expanded and foamy. If it doesn’t, your yeast may have expired, which means your bread won’t rise—go buy some fresh yeast!Once your yeast has activated, add remaining ½ cup lukewarm water to the bowl along with the rest of the sugar, egg, egg yolks, honey, canola oil, salt and spices. Use a whisk to thoroughly blend the ingredients together.
3. Whisk in the brown sugar and pumpkin puree to form a thick liquid.Begin adding the flour to the bowl by half-cupfuls, stirring with a large spoon each time flour is added. When mixture becomes too thick to stir, use your hands to knead. Continue to add flour and knead the dough until it’s smooth, elastic, and not sticky. The amount of flour you will need to achieve this texture varies—only add flour until the dough feels pliable and “right.”
4. Place a saucepan full of water on the stove to boil. Meanwhile, remove the dough from your mixing bowl and wash out the bowl. Grease the bowl with canola oil. Push the dough back into the bottom of the bowl, then flip it over so that both sides are slightly moistened by the oil.Cover the bowl with a clean, damp kitchen towel.
5. Place the bowl of dough on the middle rack of your oven. Take the saucepan full of boiling water and place it below the rack where your dough sits. Close the oven, but do not turn it on. The pan of hot water will create a warm, moist environment for your dough to rise.
6. Let the dough rise for 1 hour.Take the dough bowl out and punch it down several times to remove air pockets.
7. Place it back inside the oven and let it rise for 1 hour longer.Take the dough out of the oven. Flour a smooth surface like a cutting board. Punch the dough down into the bowl a few times, then turn the dough out onto the floured surface. Knead for a few minutes, adding flour as needed to keep the dough from feeling sticky.Now your dough is ready to braid. If you plan to separate and bless the challah, do it prior to braiding. Separate the dough into two equal portions; each portion of dough will be enough for a large loaf of challah. Click here to learn How to Braid Challah.After you’ve braided your challah loaves, place them on two separate cookie sheets lined with parchment paper (this will catch any spills from your egg wash and keep your challah from sticking to the cookie sheet).Prepare your egg wash by beating the egg yolks and water till smooth. Use a pastry brush to brush a thin layer of the mixture onto the visible surface of your challah.Preheat the oven to 350 degrees F.
8. Let the braids rise 30 to 45 minutes longer. You’ll know the dough is ready to bake when you press your finger into the dough and the indentation stays, rather than bouncing back.The challah will need to bake for about 40 minutes total, but to get the best result the baking should be done in stages. First, set your timer to 20 minutes and put your challah in the oven.After 20 minutes, take the challah out of the oven. Turn the tray around, so the opposite side is facing front, and put the tray back into the oven. Turning the tray helps your challah brown evenly—the back of the oven is usually hotter than the front.The challah will need to bake for about 20 minutes longer. For this last part of the baking process, keep an eye on your challah—it may be browning faster than it’s baking. Once the challah is browned to your liking, take the tray out and tent it with foil, then place it back in the oven.
9. Remove the foil for the last 2 minutes of baking time.Take the challah out of the oven. You can test the bread for doneness by turning it over and tapping on the bottom of the loaf—if it makes a hollow sound, it’s done.
10. Let challah cool on the baking sheet or a wire cooling rack before serving.
Nutrition Information:
covered percent of daily need