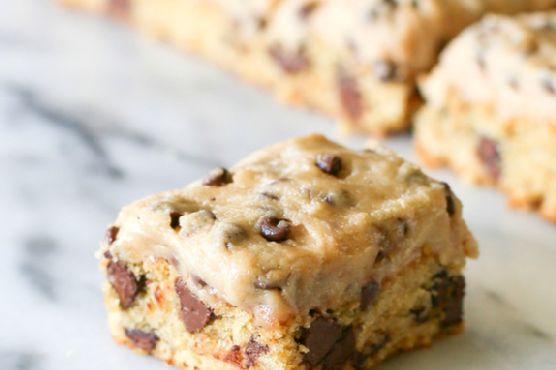
Chocolate Chip Cookie Dough Squared Bars
Chocolate Chip Cookie Dough Squared Bars requires approximately 45 minutes from start to finish. One serving contains 292 calories, 3g of protein, and 15g of fat. This recipe serves 20. For 32 cents per serving, this recipe covers 4% of your daily requirements of vitamins and minerals. A mixture of baking soda, flour, chocolate chips, and a handful of other ingredients are all it takes to make this recipe so flavorful. 3005 people were glad they tried this recipe. It works well as an inexpensive hor d'oeuvre. It is brought to you by The girl Who Ate Everything. Taking all factors into account, this recipe earns a spoonacular score of 20%, which is not so spectacular. Similar recipes are Chocolate Chip Cookie Dough Bars, Healthy Chocolate Chip Cookie Dough Bars, and Chocolate Chip Cookie Dough Billionaire Bars.
Servings: 20
Ingredients:
1/4 teaspoon baking soda
1 1/2 cups brown sugar
3/4 cup mini chocolate chips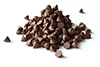
1 egg
2 1/2 cups flour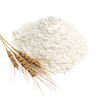
2-4 Tablespoons milk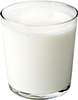
3/4 teaspoon salt
1 cup semi-sweet chocolate chips
1 cup unsalted butter, room temperature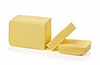
2 teaspoons vanilla extract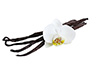
Equipment:
aluminum foil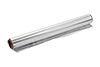
stand mixer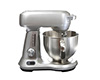
baking pan
oven
bowl
frying pan
Cooking instruction summary:
Preheat oven to 350 degrees. Line a 9x9 inch baking pan with aluminum foil and spray lightly with cooking spray.In a stand mixer, cream the butter, brown sugar, and vanilla. Add the flour and salt and mix to combine. Add about 2 Tablespoons milk. You want to add just enough so that the dough comes together. Beat well.Take 1 1/2 cups of the batter and set aside in a medium bowl for the frosting later.For the Cookie Bars: With the remaining dough, add the egg and baking soda and mix until combined thoroughly. Stir in the chocolate chips gently.Spoon batter into the prepared pan and bake for 18-20 minutes or until top begins to brown. Remove and cool completely.For the frosting: While the bars are baking finish making the frosting. The batter is stiff at this point so you want to add milk until your desired consistency. Start with 2 tablespoons of milk and add until you like it. I stir in the milk by hand in a bowl but if you wanted to use a mixer you could. Once it's to the consistency that you like, fold in the mini chocolate chips. Keep frosting at room temperature until bars are done cooling.Frost cooled bars. If you like the frosting thick like I do you may have to work to gently disperse it on the bars. Cut into squares and enjoy.Spread
Step by step:
1. Preheat oven to 350 degrees. Line a 9x9 inch baking pan with aluminum foil and spray lightly with cooking spray.In a stand mixer, cream the butter, brown sugar, and vanilla.
2. Add the flour and salt and mix to combine.
3. Add about 2 Tablespoons milk. You want to add just enough so that the dough comes together. Beat well.Take 1 1/2 cups of the batter and set aside in a medium bowl for the frosting later.For the Cookie Bars: With the remaining dough, add the egg and baking soda and mix until combined thoroughly. Stir in the chocolate chips gently.Spoon batter into the prepared pan and bake for 18-20 minutes or until top begins to brown.
4. Remove and cool completely.For the frosting: While the bars are baking finish making the frosting. The batter is stiff at this point so you want to add milk until your desired consistency. Start with 2 tablespoons of milk and add until you like it. I stir in the milk by hand in a bowl but if you wanted to use a mixer you could. Once it's to the consistency that you like, fold in the mini chocolate chips. Keep frosting at room temperature until bars are done cooling.Frost cooled bars. If you like the frosting thick like I do you may have to work to gently disperse it on the bars.
5. Cut into squares and enjoy.
6. Spread
Nutrition Information:
covered percent of daily need