Sugar Cookies with Royal Icing
Sugar Cookies with Royal Icing might be a good recipe to expand your hor d'oeuvre recipe box. For 95 cents per serving, this recipe covers 2% of your daily requirements of vitamins and minerals. This recipe makes 24 servings with 260 calories, 2g of protein, and 13g of fat each. 1869 people were glad they tried this recipe. From preparation to the plate, this recipe takes approximately 2 hours and 30 minutes. This recipe from Foodnetwork requires baking powder, salt, sugar, and vanillan extract. It can be enjoyed any time, but it is especially good for Christmas. Taking all factors into account, this recipe earns a spoonacular score of 7%, which is very bad (but still fixable). Try Christmas Cookies (Sugar Cookies) with Royal Icing, Gingerbread Cookies with Royal Icing, and Gingerbread Cookies with Royal Icing for similar recipes.
Servings: 24
Preparation duration: 45 minutes
Cooking duration: 105 minutes
Ingredients:
1 teaspoon baking powder
2 1/2 cups cake flour (not self-rising), plus more for dusting
1 large egg
Royal icing, for decorating (see right)
1/4 teaspoon salt
3/4 cup sugar
2 sticks unsalted butter, at room temperature
1 teaspoon pure vanilla extract
Equipment:
baking paper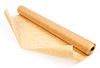
bowl
plastic wrap
baking sheet
cookie cutter
oven
whisk
paper towels
ziploc bags
offset spatula
Cooking instruction summary:
Sift the cake flour, baking powder and salt onto a piece of parchment paper or into a medium bowl; set aside. Beat the butter and sugar in a large bowl with a mixer on medium-high speed until light and fluffy, about 5 minutes. Add the egg and vanilla and beat until incorporated. Reduce the mixer speed to low and beat in the flour mixture in 2 batches until just incorporated. Divide between 2 pieces of plastic wrap; shape into disks. Wrap and refrigerate until firm, at least 1 hour. (The dough can be frozen for up to 1 month; thaw overnight in the refrigerator before rolling.) Line 2 baking sheets with parchment paper. Working with 1 disk at a time, roll out the dough on a floured surface, dusting with flour as needed, until about 1/8 inch thick. Cut out shapes with 2-to-4-inch cookie cutters; arrange 2 inches apart on the prepared baking sheets. (If the dough becomes too soft as you work, return to the refrigerator until firm.) Gather the scraps and refrigerate until firm; reroll once to cut out more cookies. Chill the cutouts 30 minutes. Position racks in the upper and lower thirds of the oven and preheat to 350 degrees F. Bake, switching the pans halfway through, until the cookies are slightly puffed and just golden, 13 to 15 minutes. Let cool 5 minutes on the baking sheets, then transfer to racks to cool completely before icing. Basic Royal Icing: Whisk one 1-pound box confectioners' sugar and 2 tablespoons meringue powder in a large bowl. Add 5 tablespoons water and beat with a mixer on medium-high speed until soft glossy peaks form, adding up to 1 more tablespoon water if necessary. Cover the bowl with a damp paper towel and plastic wrap until ready to use to prevent the icing from drying out. (Makes about 2 1/4 cups.) How to Ice Sugar Cookies: "Flooding" is a technique used to cover a cookie completely with royal icing. Here's how to do it: Transfer about 1/2 cup of the royal icing to a resealable plastic bag and snip a small corner. Use this icing to pipe a thin border around the edge of each cookie. Let set for a few minutes. Thin the remaining icing with a few drops of water until it's the consistency of syrup. Place half of the thinned icing in a resealable plastic bag and tint the rest with red and/or green gel food coloring. Transfer the colored icing to bags. Snip a corner of the white icing bag and pipe a generous amount inside the border of each cookie. Using a small offset spatula or the back of a spoon, spread the icing to cover the cookie. Decorate with the colored icing while the white icing is still wet. Let the cookies set at room temperature, at least 1 hour. Photograph by Andrew Purcell
Step by step:
1. Sift the cake flour, baking powder and salt onto a piece of parchment paper or into a medium bowl; set aside. Beat the butter and sugar in a large bowl with a mixer on medium-high speed until light and fluffy, about 5 minutes.
2. Add the egg and vanilla and beat until incorporated. Reduce the mixer speed to low and beat in the flour mixture in 2 batches until just incorporated. Divide between 2 pieces of plastic wrap; shape into disks. Wrap and refrigerate until firm, at least 1 hour. (The dough can be frozen for up to 1 month; thaw overnight in the refrigerator before rolling.)
3. Line 2 baking sheets with parchment paper. Working with 1 disk at a time, roll out the dough on a floured surface, dusting with flour as needed, until about 1/8 inch thick.
4. Cut out shapes with 2-to-4-inch cookie cutters; arrange 2 inches apart on the prepared baking sheets. (If the dough becomes too soft as you work, return to the refrigerator until firm.) Gather the scraps and refrigerate until firm; reroll once to cut out more cookies. Chill the cutouts 30 minutes.
5. Position racks in the upper and lower thirds of the oven and preheat to 350 degrees F.
6. Bake, switching the pans halfway through, until the cookies are slightly puffed and just golden, 13 to 15 minutes.
7. Let cool 5 minutes on the baking sheets, then transfer to racks to cool completely before icing.
How to Ice Sugar Cookies
Basic Royal Icing
1. Whisk one 1-pound box confectioners' sugar and 2 tablespoons meringue powder in a large bowl.
2. Add 5 tablespoons water and beat with a mixer on medium-high speed until soft glossy peaks form, adding up to 1 more tablespoon water if necessary. Cover the bowl with a damp paper towel and plastic wrap until ready to use to prevent the icing from drying out. (Makes about 2 1/4 cups.)
"Flooding" is a technique used to cover a cookie completely with royal icing. Here's how to do it
1. Transfer about 1/2 cup of the royal icing to a resealable plastic bag and snip a small corner. Use this icing to pipe a thin border around the edge of each cookie.
2. Let set for a few minutes. Thin the remaining icing with a few drops of water until it's the consistency of syrup.
3. Place half of the thinned icing in a resealable plastic bag and tint the rest with red and/or green gel food coloring.
4. Transfer the colored icing to bags. Snip a corner of the white icing bag and pipe a generous amount inside the border of each cookie.
5. Using a small offset spatula or the back of a spoon, spread the icing to cover the cookie. Decorate with the colored icing while the white icing is still wet.
6. Let the cookies set at room temperature, at least 1 hour.
7. Photograph by Andrew Purcell
Nutrition Information:
covered percent of daily need