Root Beer BBQ Braised Pork Sliders
The recipe Root Beer BBQ Braised Pork Sliders is ready in about 45 minutes and is definitely an amazing dairy free option for lovers of American food. One portion of this dish contains approximately 57g of protein, 26g of fat, and a total of 884 calories. For $4.09 per serving, you get a main course that serves 4. 45 people have tried and liked this recipe. It is perfect for Father's Day. If you have paprika, lemon peel, horseradish, and a few other ingredients on hand, you can make it. It is brought to you by Life as a Strawberry. All things considered, we decided this recipe deserves a spoonacular score of 97%. This score is super. Dude Food: Root Beer Pulled Pork Sliders, Slow Cooker Root Beer Pulled Pork Sliders, and Braised Pork Belly in Root Beer are very similar to this recipe.
Servings: 4
Ingredients:
2 bay leaves
¼ cup brown sugar
2 teaspoons cayenne pepper
1 tsp. chili powder
2 tsp. cumin
12 small dinner rolls
1 Tbsp. extra virgin olive oil
2 cloves garlic, smashed
¼ tsp. ground nutmeg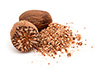
¼ cup prepared horseradish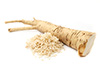
dash of hot sauce
1 Tbsp. ketchup
1 tsp. dried lemon peel
2 Tbsp. molasses
1 Tbsp. mustard
1 tsp. paprika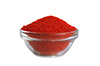
1 tsp. pepper
pepper
2 pounds pork butt roast
6 large leaves of romaine lettuce
2 cups root beer
½ cup salt
1 tsp. salt
¼ cup soy sauce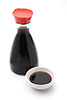
7 cups water
1 tsp. Worcestershire sauce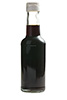
¼ yellow onion, sliced
Equipment:
bowl
plastic wrap
oven
pot
frying pan
whisk
kitchen thermometer
cutting board
mixing bowl
Cooking instruction summary:
Mix all brine ingredients together in a large bowl. Place pork butt in a 2-gallon ziploc bag (or in the bowl, if theres enough room) and pour brine over the roast. Push any air out of the bag and seal. If you have enough room in the bowl, make sure the roast is completely immersed in the brine and cover with plastic wrap to make it airtight. Keep the roast in the fridge for at least 8 hours (I left it overnight!).When youre ready to braise your pork, remove it from the brine and pat it very dry. This will help it to get a nice sear later in the cooking process. Set aside.Mix all rub ingredients together in a small bowl. Massage the rub into the pork on all sides (you may not need to use all of the rub you just need enough to coat the entire roast). Meanwhile, preheat your oven to 225 degrees.Heat a large, heavy pot (I used my Le Creuset!) over medium-high heat with a tablespoon of olive oil. Place roast in the hot pot and sear for 1-2 minutes on each side, until the sides of the roast have a nice, heard sear. When all sides are seared, remove roast from the pot and set aside.Pour cup of the root beer into the still-hot pot to deglaze the pan. Scrape any browned bits off the bottom of the pot to get all of the super duper flavor!Add the remaining root beer along with mustard, ketchup, Worcestershire, hot sauce, and soy sauce to the pot. Whisk to combine and bring to a simmer, whisking occasionally. Add smashed garlic to mixture and return roast to pot, placing it fat-side up in the pot and making sure about of it is covered by the braising liquid. Cover the pot and place it in the oven.Cook the roast for 1.75 to 2 hours per pound. My 2-lb. roast was in the oven for nearly four hours, and it was delicious! A meat thermometer will come in handy here, too a perfectly done pork roast will clock in at an internal temperature of about 200 degrees. The pork is done at about 170 internal degrees, but giving it that extra time in the oven will help it tenderize so its falling-apart-delicious!Pull the pot out of the oven and remove the roast to a plate or cutting board. Let it rest for a good half hour or so, to give it some time to cool so you dont burn your fingers off when you pull it apart. When youre ready to shred the pork, trim any excess fat off of the roast and pull it apart with two forks, your hands, or some salad forks. My preferred method is to cut the roast into 3 or 4 more manageable chunks, then throw it in a large mixing bowl and shred one chunk at a time with some metal salad forks.Once youve shredded your pork, its time to assemble! Cut each roll in half and slather on some horseradish, then top with a handful of pulled pork and some romaine. Super simple, but good! Play with the slider toppings depending on what youve got in your fridge Id recommend tomato, avocado, BBQ sauce, or corn salsa as possible accompaniments/topping alternatives. Be creative! Serve immediately, and pour a few ladlefulls of the braising liquid over any leftover pork to keep it moist.
Step by step:
1. Mix all brine ingredients together in a large bowl.
2. Place pork butt in a 2-gallon ziploc bag (or in the bowl, if theres enough room) and pour brine over the roast. Push any air out of the bag and seal. If you have enough room in the bowl, make sure the roast is completely immersed in the brine and cover with plastic wrap to make it airtight. Keep the roast in the fridge for at least 8 hours (I left it overnight!).When youre ready to braise your pork, remove it from the brine and pat it very dry. This will help it to get a nice sear later in the cooking process. Set aside.
3. Mix all rub ingredients together in a small bowl. Massage the rub into the pork on all sides (you may not need to use all of the rub you just need enough to coat the entire roast). Meanwhile, preheat your oven to 225 degrees.
4. Heat a large, heavy pot (I used my Le Creuset!) over medium-high heat with a tablespoon of olive oil.
5. Place roast in the hot pot and sear for 1-2 minutes on each side, until the sides of the roast have a nice, heard sear. When all sides are seared, remove roast from the pot and set aside.
6. Pour cup of the root beer into the still-hot pot to deglaze the pan. Scrape any browned bits off the bottom of the pot to get all of the super duper flavor!
7. Add the remaining root beer along with mustard, ketchup, Worcestershire, hot sauce, and soy sauce to the pot.
8. Whisk to combine and bring to a simmer, whisking occasionally.
9. Add smashed garlic to mixture and return roast to pot, placing it fat-side up in the pot and making sure about of it is covered by the braising liquid. Cover the pot and place it in the oven.Cook the roast for 1.75 to 2 hours per pound. My 2-lb. roast was in the oven for nearly four hours, and it was delicious! A meat thermometer will come in handy here, too a perfectly done pork roast will clock in at an internal temperature of about 200 degrees. The pork is done at about 170 internal degrees, but giving it that extra time in the oven will help it tenderize so its falling-apart-delicious!Pull the pot out of the oven and remove the roast to a plate or cutting board.
10. Let it rest for a good half hour or so, to give it some time to cool so you dont burn your fingers off when you pull it apart. When youre ready to shred the pork, trim any excess fat off of the roast and pull it apart with two forks, your hands, or some salad forks. My preferred method is to cut the roast into 3 or 4 more manageable chunks, then throw it in a large mixing bowl and shred one chunk at a time with some metal salad forks.Once youve shredded your pork, its time to assemble!
11. Cut each roll in half and slather on some horseradish, then top with a handful of pulled pork and some romaine. Super simple, but good! Play with the slider toppings depending on what youve got in your fridge Id recommend tomato, avocado, BBQ sauce, or corn salsa as possible accompaniments/topping alternatives. Be creative!
12. Serve immediately, and pour a few ladlefulls of the braising liquid over any leftover pork to keep it moist.
Nutrition Information:
covered percent of daily need