Monster Eyeballs

Monster Eyeballs is a gluten free recipe with 48 servings. One portion of this dish contains approximately 3g of protein, 10g of fat, and a total of 156 calories. For 16 cents per serving, this recipe covers 3% of your daily requirements of vitamins and minerals. It works best as a hor d'oeuvre, and is done in roughly 45 minutes. It is an inexpensive recipe for fans of Creole food. 284 people found this recipe to be tasty and satisfying. If you have semisweet chocolate chips, vanillan extract, creamy peanut butter, and a few other ingredients on hand, you can make it. Halloween will be even more special with this recipe. It is brought to you by Epicurious. Taking all factors into account, this recipe earns a spoonacular score of 12%, which is not so spectacular. Monster Brains {Halloween Monster Blog Party}, Nif's Monster Batch of Monster Cookies, and Bloodshot Eyeballs are very similar to this recipe.

Servings: 48


Ingredients:

1/2 cup (1 stick) butter, at room temperature

1 (1-pound) package confectioners' sugar (about 4 cups)

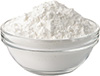
1 1/2 cups creamy peanut butter

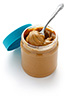
1 (3-ounce) package miniature M&Ms

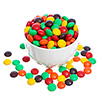
1 (12-ounce) package semisweet chocolate chips (2 cups)

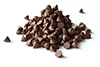
2 tablespoons solid vegetable shortening

1 teaspoon vanilla extract

Equipment:

bowl

baking sheet

wax paper

double boiler

toothpicks

Cooking instruction summary:

Preparation 1. Blend the peanut butter with the butter, sugar, and vanilla in a medium bowl. It may be easiest to use your hands (kids love doing this). 2. Line a rimmed baking sheet with wax paper. Roll the peanut butter mixture by teaspoons into small balls and place on the baking sheet. Refrigerate for at least 1 hour to firm up the eyeballs. 3. Put the chocolate chips and shortening in a microwave-safe bowl and melt the chocolate in the microwave: Heat on high for 60 seconds, and then stir well. If it’s not quite smooth, heat in two or three 10-second bursts, stirring well after each burst. (Alternatively, you can melt the chocolate, stirring frequently, in a double boiler, over just-simmering water. Avoid overheating, which can cause chocolate to seize up into a stiff mass.) 4. Take the sheet of balls from the refrigerator; use a fork or a toothpick to dip each one most of the way into the chocolate, leaving a round or oval opening of undipped peanut butter on top. (This opening in the chocolate will be the cornea.) Hold each ball over the chocolate to catch the drips, and then return to the wax paper, cornea side up. 5. Place an M&M in the center of the peanut butter cornea to make an iris. Refrigerate for at least 1 hour before serving. Store the eyeballs in the refrigerator or freezer and serve chilled. Excerpted from Ghoulish GoodiesCopyright © 2009 by Sharon BowersPhotography by © Kevin KennefickUsed by permission of Storey Publishing LLCAll Rights Reserved


Step by step:


1. Blend the peanut butter with the butter, sugar, and vanilla in a medium bowl. It may be easiest to use your hands (kids love doing this).

2. Line a rimmed baking sheet with wax paper.

3. Roll the peanut butter mixture by teaspoons into small balls and place on the baking sheet. Refrigerate for at least 1 hour to firm up the eyeballs.


Put the chocolate chips and shortening in a microwave-safe bowl and melt the chocolate in the microwave

1. Heat on high for 60 seconds, and then stir well. If it’s not quite smooth, heat in two or three 10-second bursts, stirring well after each burst. (Alternatively, you can melt the chocolate, stirring frequently, in a double boiler, over just-simmering water. Avoid overheating, which can cause chocolate to seize up into a stiff mass.)

2. Take the sheet of balls from the refrigerator; use a fork or a toothpick to dip each one most of the way into the chocolate, leaving a round or oval opening of undipped peanut butter on top. (This opening in the chocolate will be the cornea.) Hold each ball over the chocolate to catch the drips, and then return to the wax paper, cornea side up.

3. Place an M&M in the center of the peanut butter cornea to make an iris. Refrigerate for at least 1 hour before serving. Store the eyeballs in the refrigerator or freezer and serve chilled.

4. Excerpted from Ghoulish Goodies

5. Copyright © 2009 by Sharon Bowers

6. Photography by © Kevin Kennefick


Nutrition Information:

Quickview
156k Calories
2g Protein
9g Total Fat
15g Carbs
0% Health Score
Limit These
Calories
156k
8%

Fat
9g
15%

  Saturated Fat
4g
25%

Carbohydrates
15g
5%

  Sugar
13g
15%

Cholesterol
5mg
2%

Sodium
56mg
2%

Caffeine
6mg
2%

Get Enough Of These
Protein
2g
5%

Manganese
0.21mg
11%

Copper
0.13mg
6%

Magnesium
24mg
6%

Vitamin B3
1mg
6%

Vitamin E
0.85mg
6%

Phosphorus
47mg
5%

Fiber
1g
4%

Iron
0.63mg
3%

Zinc
0.43mg
3%

Potassium
93mg
3%

Vitamin B6
0.05mg
2%

Selenium
1µg
2%

Folate
6µg
2%

Vitamin A
66IU
1%

Vitamin B5
0.11mg
1%

Calcium
10mg
1%

covered percent of daily need
Widget by spoonacular.com


Suggested for you

Latin Chicken and Rice Pot
Pumpkin French Toast
Salisbury Steaks With Gravy
Parmesan Zucchini and Corn
Vietnamese Banh Mi Sandwich
Spinach Almond Crostini
Seasoned Green Beans
Creamed spinach grilled cheese sandwich
Three Cheese and Chicken Stuffed Shells
Chocolate Raspberry Cupcakes
Food Trivia

Yorkie Chocolate Bars are not for girls!

Food Joke

The Complete and Utter Idiot's Guide to Making a Baloney Sandwich by David Neilsen Hello. Welcome to The Complete and Utter Idiot's Guide to Making a Baloney and Cheese Sandwich. Ready for Lunch? Good! Let's begin! We're going to start our journey by assuming that you already possess each of the individual items you'll be needing to make this sandwich. It's a bit of a stretch, I know, but Lord knows we don't have time to take you shopping. So, that said, the first thing you're gonna need is a place to make your sandwich. My suggestion would be a plate. So reach into your cupboard and grab a plate. Any will do. No, that's a bowl. Plates are flat. Right, yes, that's flat, but it's a cutting board. Plates are going to be round. Yes the bowl is round, but it's not flat, is it? Just... forget it. Grab that cutting board you had in your hands. Perfect. Put it down. On the counter, not the floor. Much better. Alright, you're ready to start. You need bread. Personally, I prefer either wheat or sourdough, but you might prefer white, rye, pumpernickel, a French roll... you're just staring at me. What do you mean you don't have any bread like that? Like what? What kind of bread do you have? Wonder. Fine, it's pre-sliced. Take out two slices of Wonder Bread. Two. More than one, less than three. That's three. Put one back. Perfect. Place your two slices of Wonder Bread on your cutting board. See how easy this is? OK, you need some sandwich ingredients, open your refrigerator. Your refrigerator. Big thing in your kitchen. Stores food. Yes, and beer, too. That's the one. Take out the cheese, the baloney, the mayo... you're giving me that look again. Let's stop there. Cheese, baloney and mayo. Mayonnaise. It's a sandwich spread. White. No, that's Miracle Whip. Yes, it's a white sandwich spread but... fine. Miracle Whip will do. Put it on the counter next to the bread. OK. Now we...where's the cheese and baloney? Didn't I just say... ugh! Go back to the refrigerator and.. no, leave the Miracle Whip where it is, just go back to the fridge and open it. Good. Grab the cheese. Any kind will do. Oh, just pick one! No, that's brie. It doesn't go well with baloney. What in the world are you doing with brie? How about cheddar, do you have cheddar? It's probably orange. Yes! That's cheddar! Bring it to the counter next to cutting board. Now go back to the fridge. I'm sorry, are you getting dizzy? It can happen, get used to it. Open the fridge again. You're looking for baloney. God willing, it'll be pre-sliced. Baloney. It's meat. You're looking for a package filled with slices of meat. That's bacon. Yes! That's the baloney! Very good! Now bring that over to the food. No, we're done with the fridge, you'll just throw out whatever you don't use, I can't bear to go through the fridge disaster again. OK, now you're ready to start making a baloney and cheese sandwich. Open the Miracle Whip. Open it. Twist the lid off of the jar. What do you mean it won't come off? Twist the other direction. There ya go! Now you need a knife. Oh give me a break! You don't need a sharp knife, you just need a spreading knife. Dull. Very dull. The duller the better. No! Not that! Put that down before you kill someone! Try to find a knife without a wooden handle. No, that has a wooden handle doesn't it? That probably means it's sharp. Don't test it to see! Just put it down! Find a dull, regular, boring knife! OK. Perfect. That's a nice simple spreading knife. Dip it into the Miracle Whip. Now lift it out of the Miracle Whip and spread it on the slices of bread. Carefully. Not too hard, you'll tear the bread. Harder than that. The knife has to at least touch the bread to leave the spread. There ya go. Now do the other slice of bread. Perfect! You're a regular Julia Childs now! She's a famous cook... nevermind. OK, Now you are going to place a slice of baloney on one piece of bread. Open the package. No, this package doesn't screw open. Just pull the back end away from the rest of the package. See how i.

Popular Recipes
Corn and Squash Simmered in Coconut Milk withThai Basil

Vegetarian Times

Creamy Chimichurri Sauce + a Video

Food Faith Fitness

Peanut Butter & Chocolate Banana Bread

Tidy Mom

Spice-rubbed Bristol Bay Salmon

Shes Cookin

Ginger Garlic Chili Salmon

foodista.com