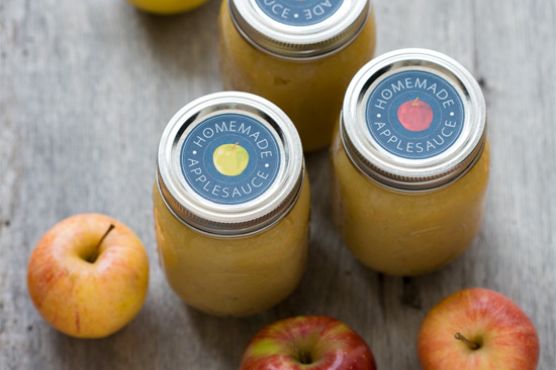
Homemade Applesauce
Homemade Applesauce is a gluten free, dairy free, lacto ovo vegetarian, and vegan side dish. One serving contains 406 calories, 2g of protein, and 1g of fat. This recipe serves 8 and costs $2.38 per serving. Plenty of people made this recipe, and 9685 would say it hit the spot. A mixture of apples, cinnamon, juice of lemon, and a handful of other ingredients are all it takes to make this recipe so scrumptious. It is brought to you by Love and Olive Oil. From preparation to the plate, this recipe takes roughly 45 minutes. Taking all factors into account, this recipe earns a spoonacular score of 67%, which is solid. Try Homemade Applesauce, Homemade Applesauce, and Homemade Applesauce for similar recipes.
Servings: 8
Ingredients:
12 pounds apples (a mixture of sweet apple varieties, such as Gala, Fuji, Rome, Golden Delicious, or Pink Lady will make the best applesauce)
1 teaspoon cinnamon (optional, to taste)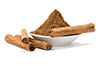
1/2 to 1 cup granulated sugar (more or less to taste)
2 lemons, juiced (about 4 tablespoons)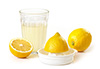
Equipment:
canning jar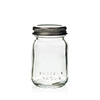
sauce pan
ladle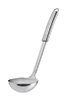
wire rack
food processor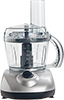
potato masher
blender
Cooking instruction summary:
Prepare canner and wash/sterilize 8 pint-size mason jars. Keep jars in hot (not boiling) water until ready to use. Warm lids in hot (not boiling) water to sterilize and soften seal.Core and quarter apples, removing any obvious bruises or blemishes. Place apples in a large, heavy saucepan filled with 1 inch of filtered tap or spring water. Cover and simmer over high heat until apples are soft, about 10 to 20 minutes (cooking time will depending on the variety and ripeness of your apples).Run cooked apples through a food mill to remove skins and seeds. Return to saucepan and bring to a simmer. Add lemon juice, along with sugar and spices to taste (the sweeter your apples, the less sugar you will need. Start with a little bit, then taste, and add more as desired). Ladle hot sauce into jars, leaving 1/2-inch of headspace. Remove any air bubbles, and carefully wipe jar rims and threads. Center lids and screw on ring bands until fingertip-tight. Place jars in water bath, ensuring they are completely covered by at least 1-inch with water. Bring to a full rolling boil and process for 20 minutes. Uncover and remove from heat; let sit for 5 minutes to allow the pressure to equalize. Carefully lift jars from water and arrange on a wire rack. Let cool completely, undisturbed, for 12 to 24 hours. Check seals. Store jars in a cool, dark place for up to 1 year. Any unsealed jars should be refrigerated and used within 3 weeks.**No food mill? No problem. While a food mill is the quickest and easiest way to make applesauce, you can do it without one. You’ll want to peel your apples first before coring and cooking them. After cooking, mash with a potato masher for a chunkier sauce, or puree in a food processor or blender (in batches if necessary) for a smoother sauce.
Step by step:
1. Prepare canner and wash/sterilize 8 pint-size mason jars. Keep jars in hot (not boiling) water until ready to use. Warm lids in hot (not boiling) water to sterilize and soften seal.Core and quarter apples, removing any obvious bruises or blemishes.
2. Place apples in a large, heavy saucepan filled with 1 inch of filtered tap or spring water. Cover and simmer over high heat until apples are soft, about 10 to 20 minutes (cooking time will depending on the variety and ripeness of your apples).Run cooked apples through a food mill to remove skins and seeds. Return to saucepan and bring to a simmer.
3. Add lemon juice, along with sugar and spices to taste (the sweeter your apples, the less sugar you will need. Start with a little bit, then taste, and add more as desired). Ladle hot sauce into jars, leaving 1/2-inch of headspace.
4. Remove any air bubbles, and carefully wipe jar rims and threads. Center lids and screw on ring bands until fingertip-tight.
5. Place jars in water bath, ensuring they are completely covered by at least 1-inch with water. Bring to a full rolling boil and process for 20 minutes. Uncover and remove from heat; let sit for 5 minutes to allow the pressure to equalize. Carefully lift jars from water and arrange on a wire rack.
6. Let cool completely, undisturbed, for 12 to 24 hours. Check seals. Store jars in a cool, dark place for up to 1 year. Any unsealed jars should be refrigerated and used within 3 weeks.**No food mill? No problem. While a food mill is the quickest and easiest way to make applesauce, you can do it without one. You’ll want to peel your apples first before coring and cooking them. After cooking, mash with a potato masher for a chunkier sauce, or puree in a food processor or blender (in batches if necessary) for a smoother sauce.
Nutrition Information:
covered percent of daily need
Related Videos:
How to Make and Can Homemade Applesauce