Flaky Pie Crust
Flaky Pie Crust is a crust that serves 8. Watching your figure? This lacto ovo vegetarian recipe has 470 calories, 7g of protein, and 31g of fat per serving. For 43 cents per serving, this recipe covers 14% of your daily requirements of vitamins and minerals. If you have pastry flour, granulated sugar, ice water, and a few other ingredients on hand, you can make it. A couple people made this recipe, and 83 would say it hit the spot. From preparation to the plate, this recipe takes roughly 2 hours and 45 minutes. It is brought to you by Leites Culinaria. All things considered, we decided this recipe deserves a spoonacular score of 49%. This score is good. If you like this recipe, you might also like recipes such as Tender Flaky Pie Crust, Flaky Baked Pie Crust, and How to Make Perfectly Flaky Pie Crust.
Servings: 8
Preparation duration: 25 minutes
Cooking duration: 140 minutes
Ingredients:
2/3 cup (3 1/2 ounces) all-purpose flour, plus more for the work surface
2 tablespoons granulated sugar
1/2 cup (4 ounces) ice-cold water (see LC note above), or more as needed
1 tablespoon kosher salt, or 1 1/2 teaspoons table salt
2 2/3 cups (12 1/4 ounces) pastry flour
2 sticks (8 ounces) unsalted butter, freezer-cold (see LC Note above), cut into 1/2-inch dice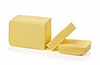
1/4 cup (2 ounces) vegetable shortening, freezer-cold (see LC note above)
2 teaspoons distilled white vinegar.jpg)
Equipment:
stand mixer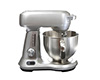
hand mixer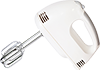
bowl
measuring cup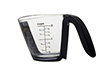
food processor
spatula
plastic wrap
rolling pin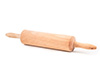
pie form
frying pan
Cooking instruction summary:
To make the crust in a stand mixer1. In the bowl of an electric mixer fitted with the paddle attachment, combine the flours, sugar, and salt. Add the cold butter and shortening, mixing on low speed until the mixture looks shaggy and the pieces of butter are slightly smaller than peas. Stop the mixer and check the size of the butter, sifting through the mixture with your hands. If you find a few bigger chunks, quickly smear them between your fingers.2. Pour the ice-cold water and vinegar into a measuring cup or small container and stir to combine.3. Add the water-vinegar mixture to the flour-fat mixture in the electric mixer on low speed and mix briefly with a few rotations of the paddle, but do not let the dough come together.4. Turn off the mixer and scrape the sides and the bottom of the mixer bowl to make sure there are no pockets of dry ingredients, rotating the paddle a few more times if needed, then squeeze a small amount of dough in your hand. The dough should come together as a clump. If the dough seems too dry, add a little more water a few teaspoons at a time, and rotate the paddle a few more times.To make the crust in a food processor5. Put the flours, sugar, and salt in the bowl of a food processor and pulse a few times to combine. Add the cold butter and shortening to the dry ingredients. Use your hands to break up the shortening into several small clumps, being careful to avoid the metal blade, and get the shortening coated with flour.6. Pulse 9 to 12 times. Turn off the machine and take the lid off. The butter should be in pieces a little smaller than the size of a pea. If needed, put the lid back on and pulse a couple more times.7. Pour the ice-cold water and vinegar into a measuring cup or small container and stir to combine.8. Gradually pour the water-vinegar mixture through the feed tube while pulsing 10 to 12 times. Take the lid off. Use your fingers to see if you can clump the mixture together to form a dough. (The dough should not come together to form a ball while you are pulsing it in the food processor, but it should form a clump pressed between your fingers.) Use a rubber spatula to scrape the sides of the food processor bowl and the bottom of the bowl to see if there are any dry pockets of flour. If the dough seems too dry, you can add more water, a few teaspoons at a time, and pulse a few more times.Knead the dough9. Whether using the stand mixer or food processor method, dump the dough, which will still be crumbly and loose, onto a very lightly floured work surface. Use your hands to work the dough into a cohesive ball, then flatten the ball into a disk. (Note: Because this dough contains pastry or cake flour, which is a soft flour, and because it contains a little vegetable shortening, you can work it with your hands a few times, forming it into a ball and making it cohesive, without having to worry as much about toughening the dough. Feel free to work the dough enough to make it cohesive.)Shape the dough10. Divide the dough in half and shape it into 2 flattened disks, then wrap each in plastic wrap. Refrigerate it for at least 2 hours or overnight before rolling. (This pastry dough also freezes well for longer storage, but allow it to first rest in the refrigerator for 1 or 2 hours before freezing.)11. When you are ready to roll the dough, unwrap it, place it on a lightly floured surface, and let it rest for 5 to 10 minutes so it’s not quite so cold and stiff. Using a rolling pin, roll the dough out to a round about 12 inches in diameter and about 1/8 inch thick. Transfer 1 round of dough to a 9-inch pie pan. (An easy way to transfer the dough is to fold the dough in half or into quarters. Pick up the folded dough and place it in the pan, then unfold gently, easing—not stretching—it into the pan.) Use your fingers to press the dough lightly against the sides of the pan all the way around so the dough won’t slide down. Trim the excess dough to a 3/4- to 1-inch overhang. Fold the overhang up and over (toward the inside of the pan) and use your hands to press gently on the dough all around the circumference to form a neat pastry rim 1/4 to 1/2 inch thick. (The pastry rim should be flush with the edge of the pie pan and not overhanging it.) 12. Fill the pie with your preferred filling, top with the remaining dough round, and press the pastry down against the rim of the pan at about 1-inch intervals to crimp and seal.
Step by step:
1. To make the crust in a stand mixer
2. In the bowl of an electric mixer fitted with the paddle attachment, combine the flours, sugar, and salt.
3. Add the cold butter and shortening, mixing on low speed until the mixture looks shaggy and the pieces of butter are slightly smaller than peas. Stop the mixer and check the size of the butter, sifting through the mixture with your hands. If you find a few bigger chunks, quickly smear them between your fingers.
4. Pour the ice-cold water and vinegar into a measuring cup or small container and stir to combine.
5. Add the water-vinegar mixture to the flour-fat mixture in the electric mixer on low speed and mix briefly with a few rotations of the paddle, but do not let the dough come together.
6. Turn off the mixer and scrape the sides and the bottom of the mixer bowl to make sure there are no pockets of dry ingredients, rotating the paddle a few more times if needed, then squeeze a small amount of dough in your hand. The dough should come together as a clump. If the dough seems too dry, add a little more water a few teaspoons at a time, and rotate the paddle a few more times.To make the crust in a food processor
7. Put the flours, sugar, and salt in the bowl of a food processor and pulse a few times to combine.
8. Add the cold butter and shortening to the dry ingredients. Use your hands to break up the shortening into several small clumps, being careful to avoid the metal blade, and get the shortening coated with flour.
9. Pulse 9 to 12 times. Turn off the machine and take the lid off. The butter should be in pieces a little smaller than the size of a pea. If needed, put the lid back on and pulse a couple more times.
10. Pour the ice-cold water and vinegar into a measuring cup or small container and stir to combine.
11. Gradually pour the water-vinegar mixture through the feed tube while pulsing 10 to 12 times. Take the lid off. Use your fingers to see if you can clump the mixture together to form a dough. (The dough should not come together to form a ball while you are pulsing it in the food processor, but it should form a clump pressed between your fingers.) Use a rubber spatula to scrape the sides of the food processor bowl and the bottom of the bowl to see if there are any dry pockets of flour. If the dough seems too dry, you can add more water, a few teaspoons at a time, and pulse a few more times.Knead the dough
12. Whether using the stand mixer or food processor method, dump the dough, which will still be crumbly and loose, onto a very lightly floured work surface. Use your hands to work the dough into a cohesive ball, then flatten the ball into a disk. (Note: Because this dough contains pastry or cake flour, which is a soft flour, and because it contains a little vegetable shortening, you can work it with your hands a few times, forming it into a ball and making it cohesive, without having to worry as much about toughening the dough. Feel free to work the dough enough to make it cohesive.)Shape the dough1
13. Divide the dough in half and shape it into 2 flattened disks, then wrap each in plastic wrap. Refrigerate it for at least 2 hours or overnight before rolling. (This pastry dough also freezes well for longer storage, but allow it to first rest in the refrigerator for 1 or 2 hours before freezing.)1
14. When you are ready to roll the dough, unwrap it, place it on a lightly floured surface, and let it rest for 5 to 10 minutes so it’s not quite so cold and stiff. Using a rolling pin, roll the dough out to a round about 12 inches in diameter and about 1/8 inch thick.
15. Transfer 1 round of dough to a 9-inch pie pan. (An easy way to transfer the dough is to fold the dough in half or into quarters. Pick up the folded dough and place it in the pan, then unfold gently, easing—not stretching—it into the pan.) Use your fingers to press the dough lightly against the sides of the pan all the way around so the dough won’t slide down. Trim the excess dough to a 3/4- to 1-inch overhang. Fold the overhang up and over (toward the inside of the pan) and use your hands to press gently on the dough all around the circumference to form a neat pastry rim 1/4 to 1/2 inch thick. (The pastry rim should be flush with the edge of the pie pan and not overhanging it.) 1
16. Fill the pie with your preferred filling, top with the remaining dough round, and press the pastry down against the rim of the pan at about 1-inch intervals to crimp and seal.
Nutrition Information:
covered percent of daily need
Related Videos:
Buttercrust Pastry Dough - Flaky Butter Pie Crust Recipe
Pie Crust Recipe - How to Make Flaky Butter Pie Crust
How To Make The Ultimate Blueberry Pie Recipe + Flaky Crust