Milky Way Tart
Milky Way Tart might be just the side dish you are searching for. This recipe serves 8 and costs 70 cents per serving. One portion of this dish contains roughly 4g of protein, 27g of fat, and a total of 365 calories. This recipe from Serious Eats has 65 fans. If you have milk chocolate, heavy cream, unsalted butter, and a few other ingredients on hand, you can make it. From preparation to the plate, this recipe takes roughly 8 hours. Overall, this recipe earns a not so awesome spoonacular score of 12%. Users who liked this recipe also liked Milky Way Tart, Milky Way Tart, and Milky Way Tart.
Servings: 8
Ingredients:
1 egg yolk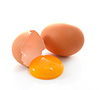
3/4 cup heavy cream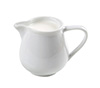
2 teaspoons instant coffee powder
1/2 teaspoon kosher salt
3- to 4-inch slab milk chocolate, at warm room temperature, for decorating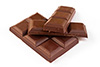
5 ounces milk chocolate, chopped
1/4 cup sugar
1 cup unbleached all-purpose flour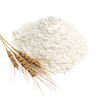
1/2 cup (1 stick) unsalted butter, at room temperature, cut into 8 pieces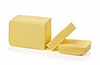
2 teaspoons vanilla extract
1/3 cup water
Equipment:
stand mixer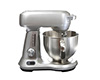
spatula
bowl
plastic wrap
baking paper
baking sheet
pie form
rolling pin
frying pan
oven
wire rack
sauce pan
sieve
whisk
pastry brush
peeler
knife
Cooking instruction summary:
Procedures 1 For the Pâte Sucrée: Using a stand mixer fitted with the paddle attachment, cream together the butter, sugar, and salt on medium speed for 2 to 3 minutes, or until pale and light. Scrape the sides and bottom of the bowl with a rubber spatula. Add the flour and beat on low speed for about 30 seconds, or until the flour mixes with the butter-sugar mixture. The mixture will look like wet sand. Add the egg yolk and continue to mix on low speed for about 30 seconds, or until the dough comes together. 2 Wrap the dough tightly in plastic wrap and refrigerate for about 1 hour. (At this point, the dough can be stored in the refrigerator for up to 5 days or in the freezer for up to 2 weeks. If frozen, thaw it in the refrigerator overnight before using.) 3 If making a pie shell, have a 9-inch pie pan dish ready. If making a tart shell, line a baking sheet with parchment paper and place a 10-inch tart ring on top. Remove the dough from the refrigerator and let soften at room temperature for about 30 minutes. Using a rolling pin, bang and flatten the dough into a disk about 1/2 inch thick. Flour the work surface, and then sprinkle the dough disk with a little flour. Roll out the dough into a circle 10 to 11 inches in diameter and about 1/4 inch thick for a 9-inch pie shell, or about 12 inches in diameter and just under 1/4 inch thick for a 10-inch tart shell. Make sure the work surface is well floured so the dough doesn’t stick to it, and make sure the disk itself is floured well enough to keep the rolling pin from sticking to it. Roll from the center of the disk outward, and gently rotate the disk a quarter turn after each roll to ensure the disk is evenly stretched into a nice circle. Don’t worry if the dough breaks a bit, especially toward the edges. You can easily patch any tears once you have lined the pan. 4 Roll the dough circle around the pin and then unfurl it on top of the 9-inch pie pan or the 10-inch tart ring. Press the dough well into the bottom and sides of the pan or ring, and use any scraps or odd pieces to patch up any tears or missing bits. Make sure the entire interior is well covered with dough, and then press one last time all the way around to ensure any holes have been patched. Trim the edge of the dough so it is even with the rim of the pan or ring. 5 Refrigerate the pastry shell for at least 30 minutes. The gluten needs a little time to relax so the pastry doesn’t shrink in the oven. (The pastry shell can be tightly wrapped in plastic wrap and refrigerated for up to 1 day or frozen for up to 2 weeks. Bake directly from the refrigerator or freezer.) 6 Position a rack in the center of the oven, and heat the oven to 350°F. 7 Bake for 30 to 35 minutes, or until golden brown. Let cool to room temperature on a wire rack. If you are making a tart shell, remove the tart ring. Proceed as directed in individual recipes. 8 To make the mousse, place the chocolate in a small heatproof bowl. In a medium saucepan, combine the cream and instant coffee powder and scald over medium-high heat (bubbles start to form around the edge of the pan, but the cream is not boiling). Pour the hot cream mixture over the chocolate and let sit for about 1 minute, then whisk gently until the chocolate is completely melted and the mixture is smooth. Strain through a fine-mesh sieve into a small container, stir in the salt, cover tightly, and refrigerate for at least 8 hours, or until it is absolutely, completely chilled, or up to 3 days. A few hours is not enough here. Because the cream has been heated, it will not whip properly unless it is very cold. 9 To make the caramel filling, place the sugar in the bottom of a medium saucepan and slowly pour in the water. Stir gently to moisten the sugar. If any sugar crystals are clinging to the sides of the pan, brush them down with a pastry brush dipped in water. Place the pan over high heat and leave it undisturbed until the mixture comes to a rolling boil. (You want to avoid crystallization of the syrup, which can happen if the pan is disturbed before the sugar starts to color.) Then continue to boil rapidly without moving the pan until the sugar syrup starts to caramelize. This will take 3 to 4 minutes: the sugar syrup will boil furiously; then as it thickens, it will boil more languidly; and then you will see some of the syrup starting to color and darken around the edge of the pan. 10 When you see color in the pan, gently swirl it in a circular motion so the sugar caramelizes evenly. The syrup will start to turn golden brown, and then as you swirl the pan, the syrup will continue to get a bit darker and then darker still. To check the true color of the caramel, tilt the pan so you can see the syrup covering the bottom. This is the actual color of the caramel, and you want to keep cooking the caramel until this layer is a deep amber-brown. It takes just seconds for caramel to go from great to burnt, so be sure to tilt and check constantly. 11 As soon as the caramel is ready, slowly add the cream and then reduce the heat to low. Be careful, because the steam that rises when the cream hits the caramel is extremely hot. Let the caramel and cream sputter for a few seconds until the mixture settles down, and then whisk to mix in the cream. Turn the heat up to medium and whisk together the caramel and cream (the mixture will have hardened a bit) for 2 to 3 minutes, or until they come together. Whisk in the butter, salt, and vanilla. 12 Remove from the heat, pour into an airtight heatproof container, and refrigerate for at least 4 hours or up to 1 week. 13 Place the tart shell on a flat plate. Spread about three-fourths of the caramel filling evenly in the bottom of the tart shell. Using a stand mixer fitted with the whip attachment (or a handheld mixer or a whisk), whip the mousse on medium speed until it holds soft peaks. Mound the mousse in the shell, and spread it evenly over the caramel filling. Drizzle the remaining one-fourth caramel filling in a crisscross pattern on top of the mousse. Using the back of a small knife or a vegetable peeler, shave curls from the milk chocolate slab. (Make sure the chocolate is slightly warm, or you will get splinters instead of curls.)Decorate the pie with the curls. 14 Chill for at least 30 minutes before serving. 15 The tart can be stored in an airtight container in the refrigerator for up to 8 hours.
Step by step:
1. 1
2. For the Pâte Sucrée: Using a stand mixer fitted with the paddle attachment, cream together the butter, sugar, and salt on medium speed for 2 to 3 minutes, or until pale and light. Scrape the sides and bottom of the bowl with a rubber spatula.
3. Add the flour and beat on low speed for about 30 seconds, or until the flour mixes with the butter-sugar mixture. The mixture will look like wet sand.
4. Add the egg yolk and continue to mix on low speed for about 30 seconds, or until the dough comes together.
5. 2
6. Wrap the dough tightly in plastic wrap and refrigerate for about 1 hour. (At this point, the dough can be stored in the refrigerator for up to 5 days or in the freezer for up to 2 weeks. If frozen, thaw it in the refrigerator overnight before using.)
7. 3
8. If making a pie shell, have a 9-inch pie pan dish ready. If making a tart shell, line a baking sheet with parchment paper and place a 10-inch tart ring on top.
9. Remove the dough from the refrigerator and let soften at room temperature for about 30 minutes. Using a rolling pin, bang and flatten the dough into a disk about 1/2 inch thick. Flour the work surface, and then sprinkle the dough disk with a little flour.
10. Roll out the dough into a circle 10 to 11 inches in diameter and about 1/4 inch thick for a 9-inch pie shell, or about 12 inches in diameter and just under 1/4 inch thick for a 10-inch tart shell. Make sure the work surface is well floured so the dough doesn’t stick to it, and make sure the disk itself is floured well enough to keep the rolling pin from sticking to it.
11. Roll from the center of the disk outward, and gently rotate the disk a quarter turn after each roll to ensure the disk is evenly stretched into a nice circle. Don’t worry if the dough breaks a bit, especially toward the edges. You can easily patch any tears once you have lined the pan.
12. 4
13. Roll the dough circle around the pin and then unfurl it on top of the 9-inch pie pan or the 10-inch tart ring. Press the dough well into the bottom and sides of the pan or ring, and use any scraps or odd pieces to patch up any tears or missing bits. Make sure the entire interior is well covered with dough, and then press one last time all the way around to ensure any holes have been patched. Trim the edge of the dough so it is even with the rim of the pan or ring.
14. 5
15. Refrigerate the pastry shell for at least 30 minutes. The gluten needs a little time to relax so the pastry doesn’t shrink in the oven. (The pastry shell can be tightly wrapped in plastic wrap and refrigerated for up to 1 day or frozen for up to 2 weeks.
16. Bake directly from the refrigerator or freezer.)
17. 6
18. Position a rack in the center of the oven, and heat the oven to 350°F.
19. 7
20. Bake for 30 to 35 minutes, or until golden brown.
21. Let cool to room temperature on a wire rack. If you are making a tart shell, remove the tart ring. Proceed as directed in individual recipes.
22. 8
23. To make the mousse, place the chocolate in a small heatproof bowl. In a medium saucepan, combine the cream and instant coffee powder and scald over medium-high heat (bubbles start to form around the edge of the pan, but the cream is not boiling).
24. Pour the hot cream mixture over the chocolate and let sit for about 1 minute, then whisk gently until the chocolate is completely melted and the mixture is smooth. Strain through a fine-mesh sieve into a small container, stir in the salt, cover tightly, and refrigerate for at least 8 hours, or until it is absolutely, completely chilled, or up to 3 days. A few hours is not enough here. Because the cream has been heated, it will not whip properly unless it is very cold.
25. 9
26. To make the caramel filling, place the sugar in the bottom of a medium saucepan and slowly pour in the water. Stir gently to moisten the sugar. If any sugar crystals are clinging to the sides of the pan, brush them down with a pastry brush dipped in water.
27. Place the pan over high heat and leave it undisturbed until the mixture comes to a rolling boil. (You want to avoid crystallization of the syrup, which can happen if the pan is disturbed before the sugar starts to color.) Then continue to boil rapidly without moving the pan until the sugar syrup starts to caramelize. This will take 3 to 4 minutes: the sugar syrup will boil furiously; then as it thickens, it will boil more languidly; and then you will see some of the syrup starting to color and darken around the edge of the pan.
28. 10
29. When you see color in the pan, gently swirl it in a circular motion so the sugar caramelizes evenly. The syrup will start to turn golden brown, and then as you swirl the pan, the syrup will continue to get a bit darker and then darker still. To check the true color of the caramel, tilt the pan so you can see the syrup covering the bottom. This is the actual color of the caramel, and you want to keep cooking the caramel until this layer is a deep amber-brown. It takes just seconds for caramel to go from great to burnt, so be sure to tilt and check constantly.
30. 11
31. As soon as the caramel is ready, slowly add the cream and then reduce the heat to low. Be careful, because the steam that rises when the cream hits the caramel is extremely hot.
32. Let the caramel and cream sputter for a few seconds until the mixture settles down, and then whisk to mix in the cream. Turn the heat up to medium and whisk together the caramel and cream (the mixture will have hardened a bit) for 2 to 3 minutes, or until they come together.
33. Whisk in the butter, salt, and vanilla.
34. 12
35. Remove from the heat, pour into an airtight heatproof container, and refrigerate for at least 4 hours or up to 1 week.
36. 13
37. Place the tart shell on a flat plate.
38. Spread about three-fourths of the caramel filling evenly in the bottom of the tart shell. Using a stand mixer fitted with the whip attachment (or a handheld mixer or a whisk), whip the mousse on medium speed until it holds soft peaks. Mound the mousse in the shell, and spread it evenly over the caramel filling.
39. Drizzle the remaining one-fourth caramel filling in a crisscross pattern on top of the mousse. Using the back of a small knife or a vegetable peeler, shave curls from the milk chocolate slab. (Make sure the chocolate is slightly warm, or you will get splinters instead of curls.)Decorate the pie with the curls.
40. 14
41. Chill for at least 30 minutes before serving.
42. 15
43. The tart can be stored in an airtight container in the refrigerator for up to 8 hours.
Nutrition Information:
covered percent of daily need